[POTW: 3] Milestone Project 1 - Mesh Mashup: Edits & HD
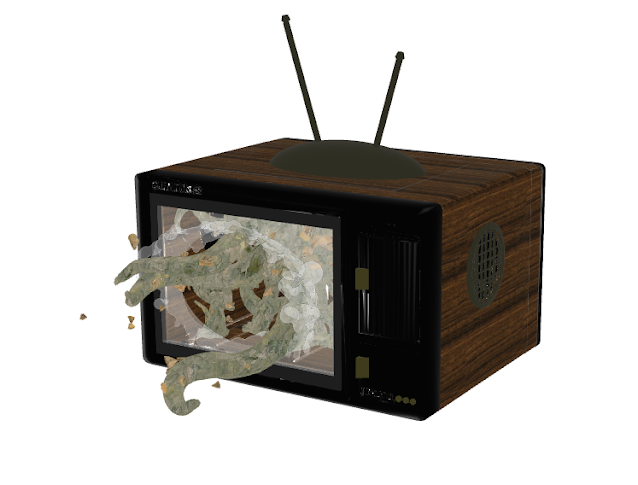
Last week, we started learning MeshMixer to help us fine-tune, adjust, and create layers on our meshes from Rhino 7 (.stl files), with the concepts we created the last few weeks prior. After using MeshMixer and saving as an .obj file, it gets tossed back into Rhino 7 and rendered with textures and lighting. The goal was to create a minimum of 6 or more HD photos with varying lighting and perspectives.
Something useful I learned on MeshMixer while troubleshooting - if there are any items in the scene with blue, red, or pink lines or pins those are indicators of mesh errors. To check, it's Analysis>Inspector.
Blue is a patchable/small mesh error, which signifies open boundaries in the mesh.
Pink indicates that the mesh isn't connected to the main source.
Red is a pain in the ... it indicates a much larger mesh issue that can't be patched over easily. Red = non-manifold edges, complex surface meshes made with edge loops.
The concept: 


Initial Render:
I would have liked to cut out the front panel of the tv into more sections, and separate the logo to add more textures but I didn't want to risk breaking the meshes or gaining more non-manifold issues. Of the photos, the majority of them are screenshots, some I saved through the render preview. Most of them turned out pretty grainy.
[Resolution/quality is 2560x1920 (4:3), DPI 200, final.]


Spotlights:
 |
| Trying out different coloured spotlights |

 |
| Duotone lighting always has a horror/scifi vibe, but somewhere along the way my mesh broke for the vines in this set (red backgrounds). |
 |
| Not sure what filter this was in rendering. Just thought it looked cool. |
I really like how these all turned out. It's been really cool learning the CAD programs so far. It's not without its hiccups but it's really cool to see how much can progress over a few weeks.


.png)


Comments
Post a Comment