 |
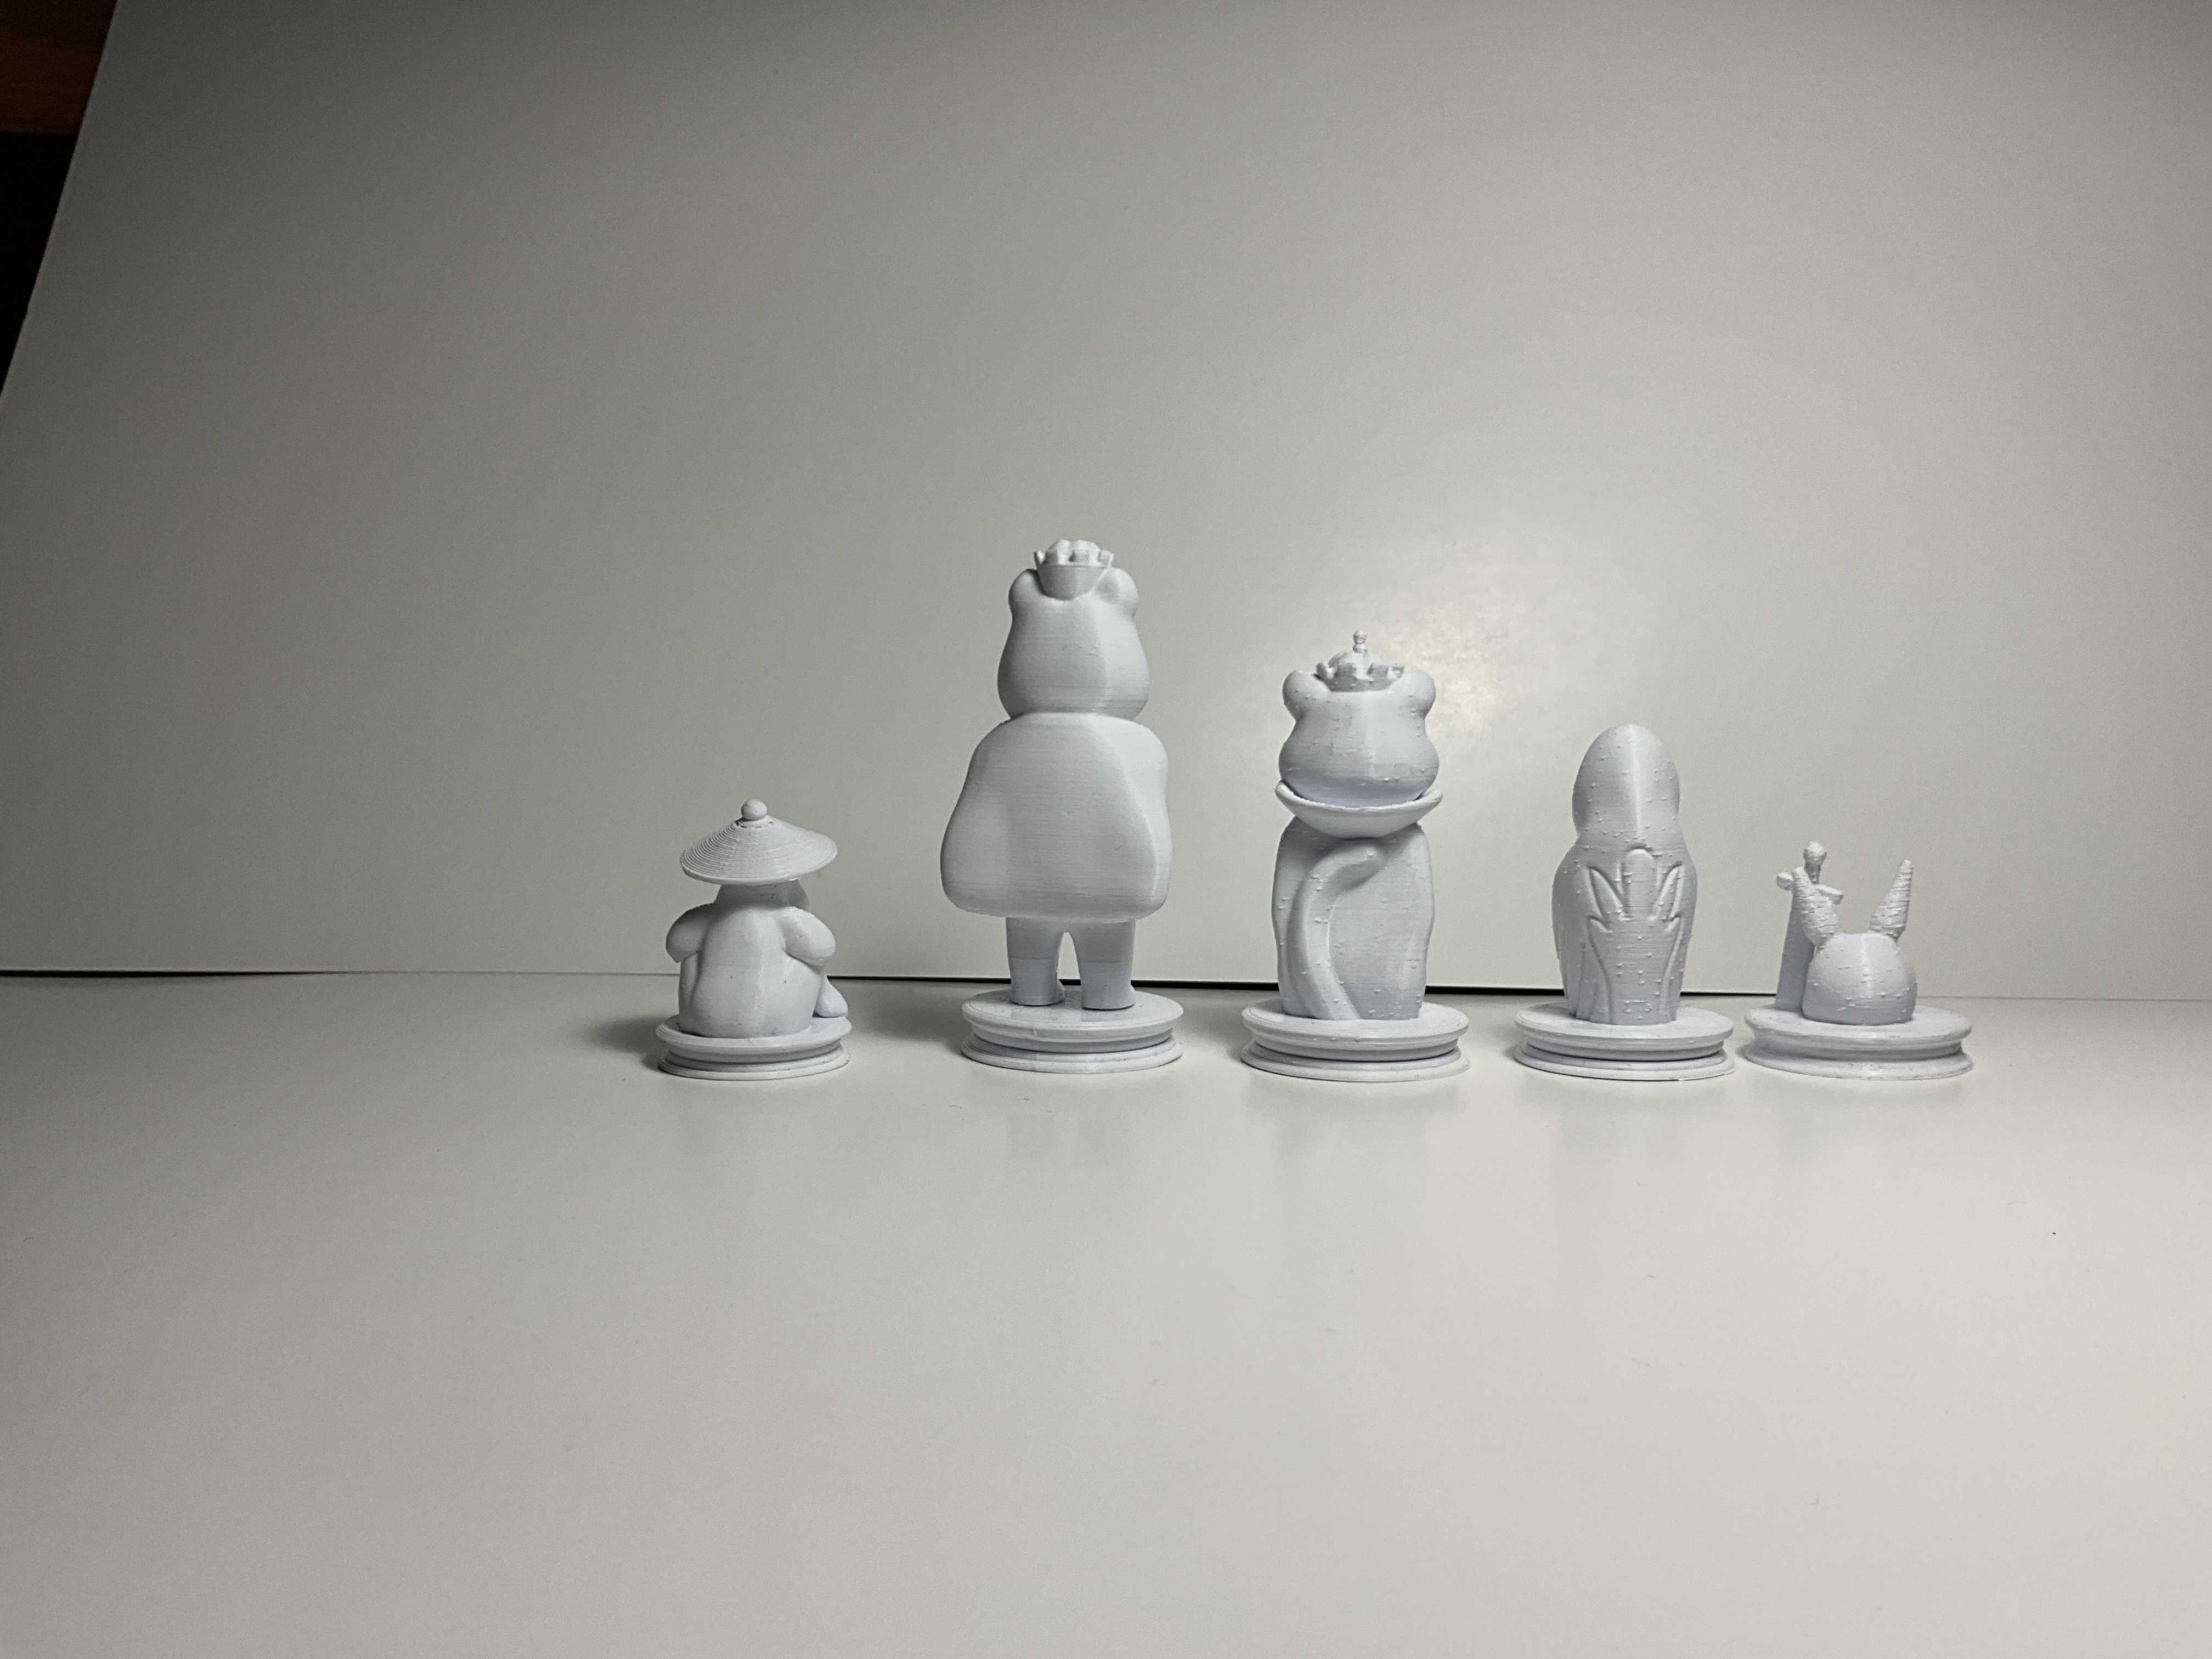
| Pawn, king, queen, rook, and knight. |
Continuing on from my previous post of the 3D printable chess sets, I've printed all my pieces except for the bishop. The theme of my chess set ended up being woodland creatures. I wanted to make a Japanese folklore based set, however after using Nomad and I wanted to experiment more with figurine style pieces. Since taking up Nomad, it would be cool to try Blender in the future... it looks like a good 'blend' between CAD and sculpting.
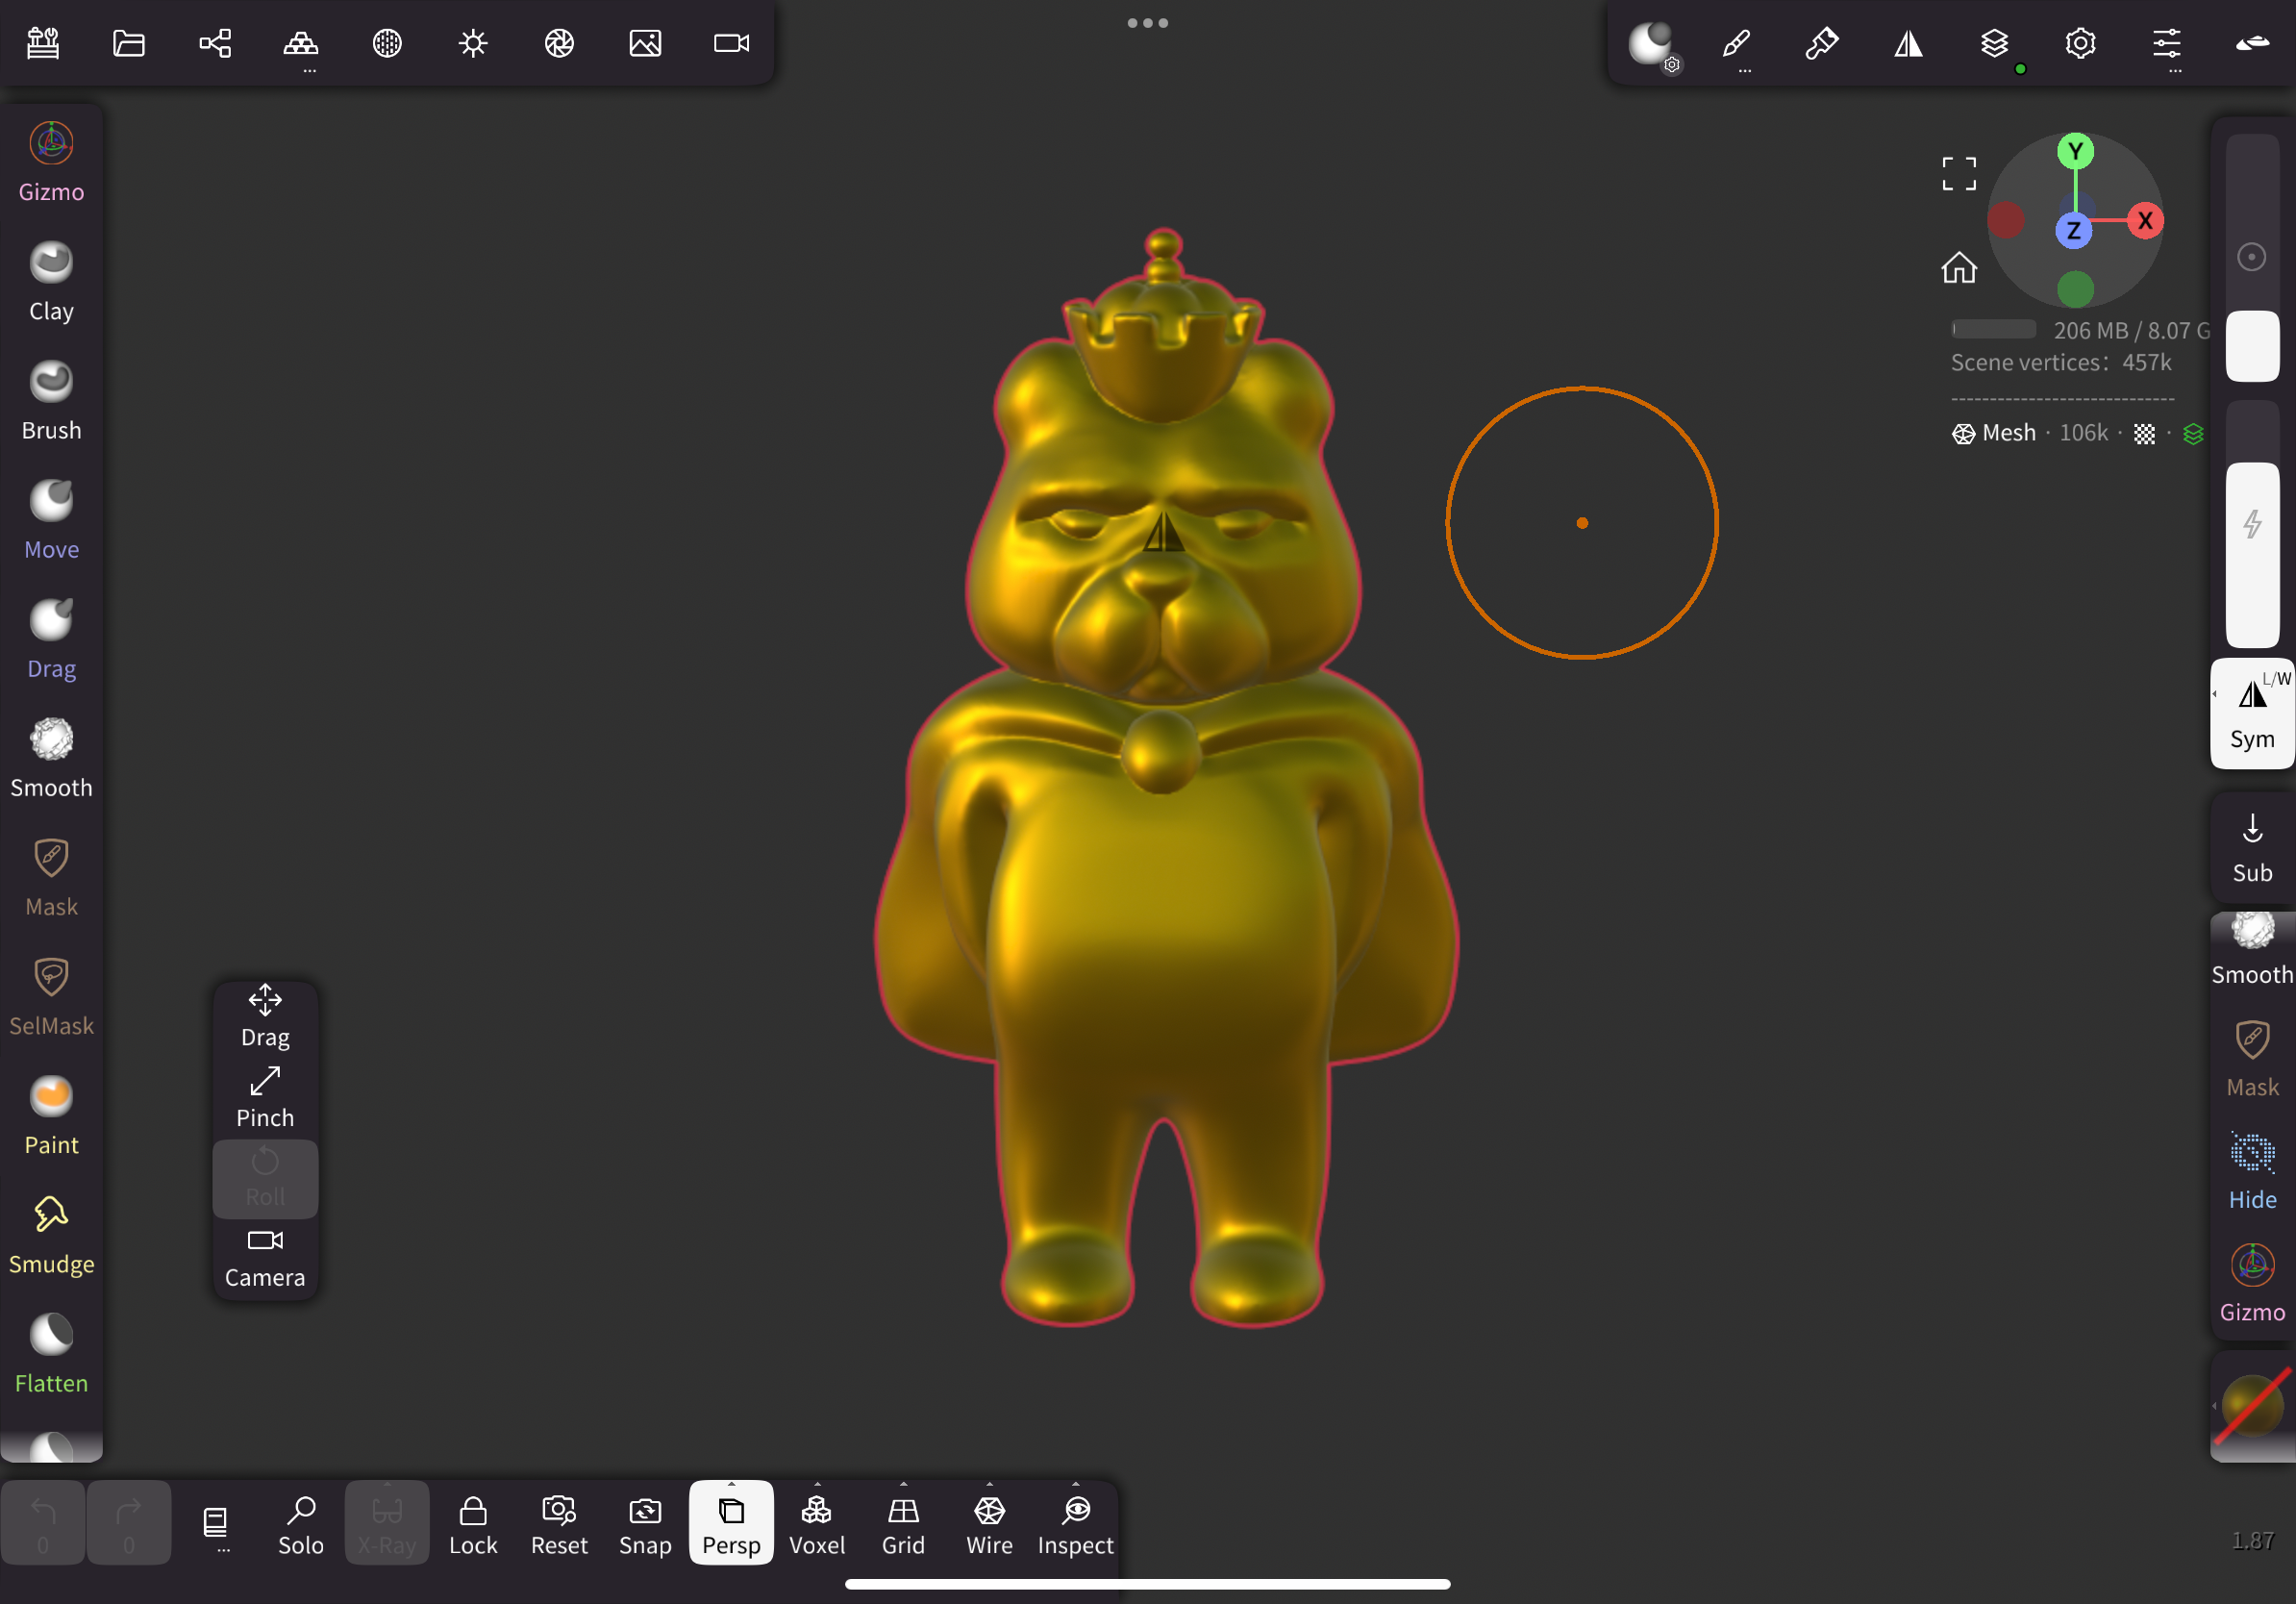
For my chess set the pawn is the frog, the king as a bear, queen as a cat, rook as a bird (originally a raven), and the knight as a rabbit. The bishop is still incomplete as I haven't been happy with any designs I've made for it. Even though my update is past the due date, I'd like to continue this project while I still have access to the studio this month and see it through til the end. I’d like to complete my bishop and the prints that I changed along with my renders.
While printing, originally the rook had a floating stand with an arm that hooked into the base and the print but after printing it, the stand post was slightly too big for the base and kinda I broke it 😅. Sooo I redesigned it as a single print, it looks a lot more like an owl. I'd like to reprint the original rook once I have the .stl file updated. I had chosen a raven as they're also known as rooks.
For my knight, the rabbit was supposed to be a full figurine of a rabbit wearing a knight helmet. Last minute I opted for a skull with the sword instead of the rabbit holding the sword; trying to work with the time I had before the studio closed for the night on Friday. With the original, the sword is a separate piece that fits into the base and the rabbit's paw snapped onto the sword's handle. Having the set with the original design over the current print would resolve the conflict of the knight being the smallest piece in height over the pawn.
Takeaways & Reflection:
- One major take away from this project and especially while learning Nomad as a new program is that I should have saved my custom UI settings as I accidentally reset them before going to the studio when downloading the Quad Remesh extension that corrected the mesh issues that I had previously.
- Time management and experience! I feel I was overly ambitious with trying to learn another program specifically for this project with no prior experience in Nomad, minimal experience with how complex meshes work in Rhino, and how Nomad interacts with Rhino too. In the process, I didn't accounted for how much time of a time sink all of this would be. In the future, I feel it would be wise not to take on more than I can chew or be more informed with the programs before trying them. With all of that though, I don't regret learning this the hard way. I encountered so many interesting opportunities because of it. I've really started to appreciate the skills that 3D artists have.
- Sometimes it's better to keep things simple and not over complicate things! It's cool to experiment, but keeping track of deadlines and time is also super important. Wanting to experiment with multiple pieces for each print and each one being different from the next is cool but not preparing my time wisely and not fully preparing how I wanted to execute each one before trial prints.
- Seam alignments in Prusa save time in sanding.
- Giving more tolerance in registration prevents issues with pieces fitting together.
- Quadremeshing in Nomad with facegroups can speed up workflow. Although I'm just learning Quadremeshing the last few days, it's pretty cool; and it functions similar to Rhino's [Quadremesh].
- Your future self will thank you if you stay organized on process documentation.
Process:
My sketches and mindmap of ideas and designs. I found this project had so many possibilities to create something and getting excited over the ‘what ifs’ to create; led to getting more caught up in exploration over just sticking to one thing and executing it.
(Nomad Screenshots )
(Rhino & Prusa)
3D Prints:
Additional Takeways ( Mainly Nomad Sculpt):
- The best resolution for printing is in the Z axis, this is good to keep in mind when orienting in Prusa. Sometimes it’s better to use the supports or rotations to save quality over time but it’s very dependent on what’s being printed. For most pieces it’s better to save the time and filament when the quality can be polished post print.
- Design objects with wireframe on in Nomad gives more control on knowing your topology.
- When starting in Nomad, start with low subdivided primitive objects instead of the starter sphere (it starts with 500k vertices). Working in high res meshes in the beginning can over complicate the simplest shapes. I found my favourite pieces were all low poly built upwards to high resolution. All the pieces I troubleshooted the most were created the opposite way.
- If symmetry in Nomad isn’t working on an object or isn’t symmetrical to the object, in the settings check if it’s set to world or local and change accordingly. I found this happened often when an object wasn’t grouped to or directly on the 0,0,0 origin. Nomad also has symmetry options for each axis as radial planes. This tool/settings is similar to Rhino’s [mirror] functions. There’s also options to flip or mask areas in these settings.
- Nomad doesn’t have alignment tools like Rhino, and is a pain in the ass at times. To align things properly to a surface, use the transform and snap tools and have snap set to 15/45/ or 90 degree; and drag the object towards the aligned object.
- Nomad has post processing for lighting, adding materials and textures and full rendering. Always save before going into rendering. If the program will crash, that’s often when it will happen. Nomad supports Matcap and PBR files. Post processing has a lot of options for SSAO, SSR, SSGI, and Bloom settings - I’m only somewhat familiar with these settings because of video games.
- Nomad doesn’t use traditional scale units for measurements like cm, inches, mm, feet, etc. It’s units are just units, to set a true size value to them, has to be done in another program after exporting the .obj / .stl / or .glTF files. Often done in a slicer program or other CAD program.
- The gizmo tool is the same as Rhino’s gumball, however it has settings for local or world and centered/bottom/none per object. To accurately scale objects, use the gizmo panel and numerical values.
- Voxel Remesh rearranges the topology into uniform density. Whereas Dynamic topology seems to do it in real time? Multi-resolution lets you change the subdivisions of the mesh but scaling it up or down and can be reverted whenever you want - it can change the shapes slightly going back and forth.
- Using layers gives more control of the mesh for detailing, not just for adding textures or painting. (I wish I knew this before modifying my meshes directly.)
- Turn off two-sided faces will save a lot of time with rendering speeds and intersecting face issues.
- Getting familiar with using masks with the extract and carve tools is really helpful. I learned from a YouTube tutorial that Shell and SyncBorder are also helpful with meshes and extracting.
- If you have a keyboard for your iPad, you can key bind a lot of Nomad’s functions and tools. It gives some familiarity to the program, having come from a background in Rhino.
- Pinning the gizmo on an object stops it from changing with every pivot.
- Boolean operations work for booleans and voxel merging. It’s similar to Rhino’s Boolean operations but is done by selecting the objects in the object panel, and toggling the visibility of each object.
(Both objects visible unions it. 1 object visible subtracts. Both or all objects hidden, intersects.)
- When you validate an object, it bakes the topology into the object. Before validating, the topology is only projected onto the object.
Anyways that’s all for now! It’s been a slice and hope to see ya in my next posts.
- K.


.png)


Comments
Post a Comment